Add & manage contacts
Walk through the basic contact flow in the wallet GUI with two nodes (Alice and Bob, both running per Setup Docker): Alice copies her node address from the Dashboard, sends a contact request from the Contacts tab, Bob accepts on his side, and Alice verifies.
My address
Before adding a contact, find your own node's address — that's what your contact will paste into their New Contact form. The Dashboard tab's Wallet Information panel shows your address (Tor .onion by default; HTTP/HTTPS too if you configured a hostname) with a one-click Copy button.
- Your Address: the locator other nodes use to reach you. .onion is always available; HTTP/HTTPS only if a hostname is set.
- Public Key: cryptographic identity, useful for verification but not pasted into contact forms.
- Total Balance / Total Fee Earnings / Total Available Credit: the three stat cards at the top of the panel.
The Dashboard's Wallet Information panel on Alice's wallet
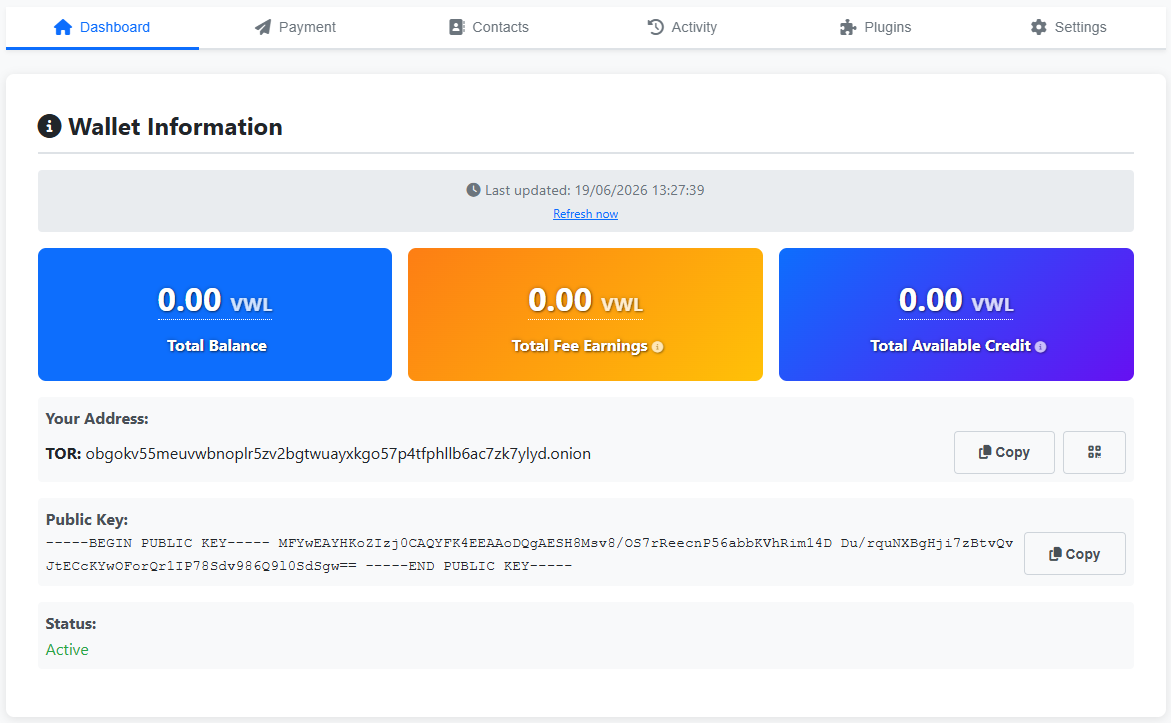
Click the Copy button next to Your Address. You'll paste it into Bob's GUI in the next step.
Add a contact
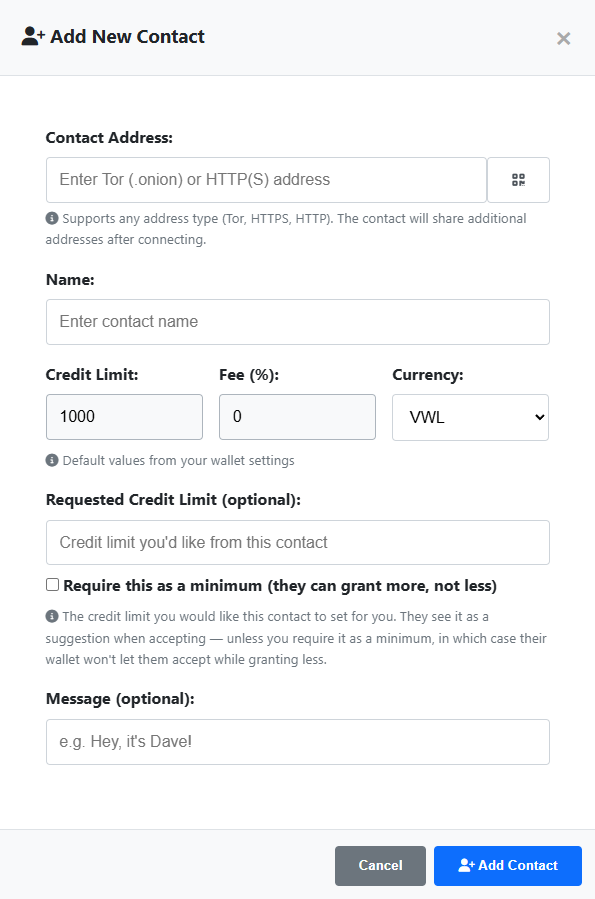
On Alice's wallet, switch to the Contacts tab and click the New Contact button at the top of the Your Contacts section. The form takes the contact's address and a display name — every other field has a sensible default and can be edited later.
- Contact Address — paste Bob's .onion (the one Bob copied from his own Dashboard).
- Display Name — what Alice will see in her own contact list.
- Currency — defaults to VWL, change if needed.
- Default Fee (%) — what Alice charges to relay this contact's transactions. Defaults to 0% (configurable in Settings → Payments → Default Fee).
- Credit Limit — how much credit Alice extends to this contact in the chosen currency. Defaults to 1000 (from Settings → Payments → Default Credit Limit). 0 means the contact exists but no money can flow yet; you can raise it later.
- (Optional) Requested Credit — a suggestion for how much credit Alice would like Bob to extend back to her.
- (Optional) Message — a short note attached to the request.
The New Contact form
Filled out for Alice's request to Bob — pasting Bob's onion address, naming the contact, raising Credit Limit from 1000 to 1200, adjusting Fee to 0.02, requesting 1500 in credit back, and a short message:
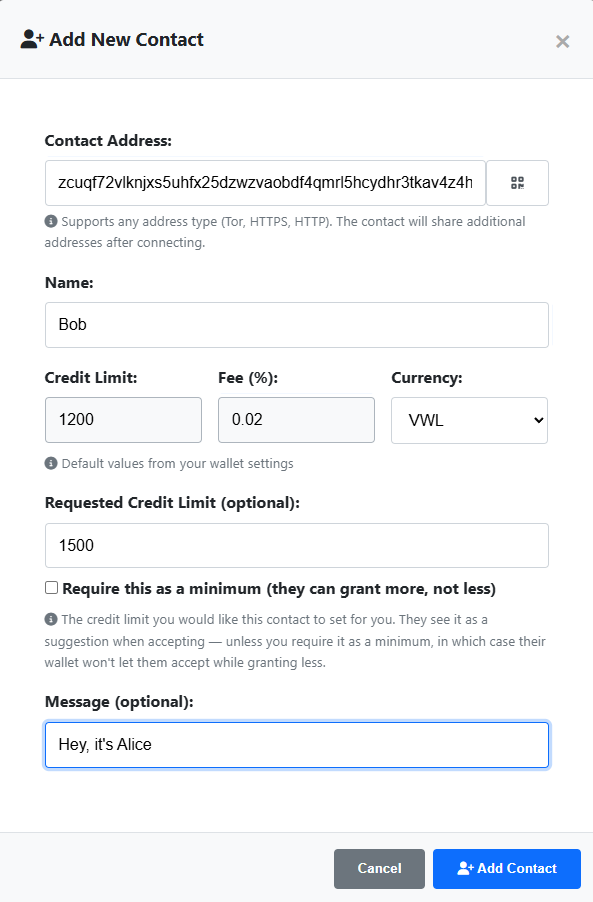
Submit the form. Alice now has an outgoing-pending row in her Contacts list, and Bob's wallet has received an incoming request — visible on his Contacts tab in the Pending Contact Requests section.
Mutual-add shortcut: if Bob runs New Contact against Alice at the same time without using the Pending Contact Requests flow, both sides recognise the cross-request and finalize automatically. Each side keeps the fee / credit they themselves entered — they don't have to match.
Accept the request
Switch to Bob's wallet (separate browser window or container). On Bob's Contacts tab the Pending Contact Requests section now lists Alice's request with whatever fee, credit, and currency she proposed.
- Bob can accept on different fee / credit terms than Alice asked for — the per-currency Apply modal lets him override.
- Bob can decline some currencies and accept others if the request was multi-currency.
- Bob can also defer — leave the request pending and act on it later.
Bob's Pending Contact Requests view

The per-currency Apply modal
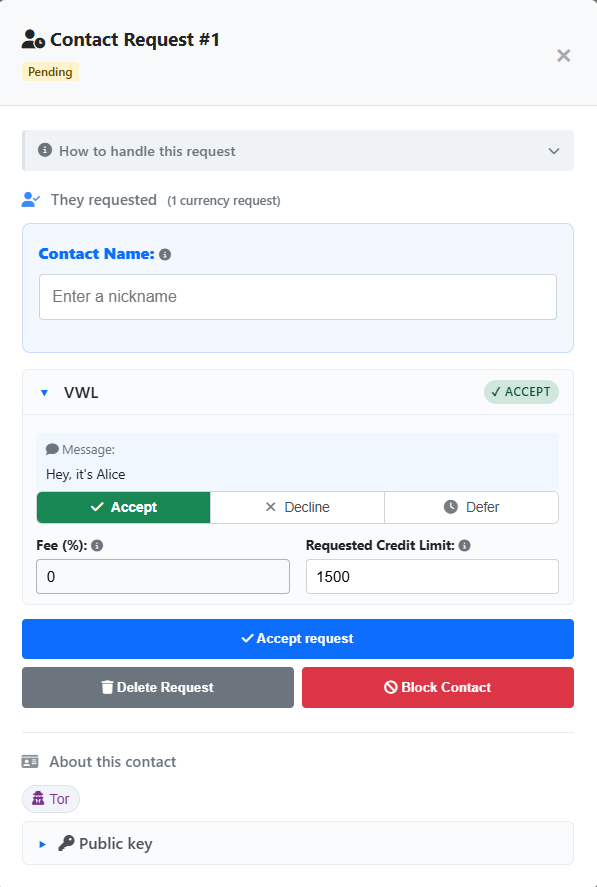
Bob clicks Accept Request. After confirmation, both wallets show the contact as accepted in their Your Contacts list.
Verify the contact
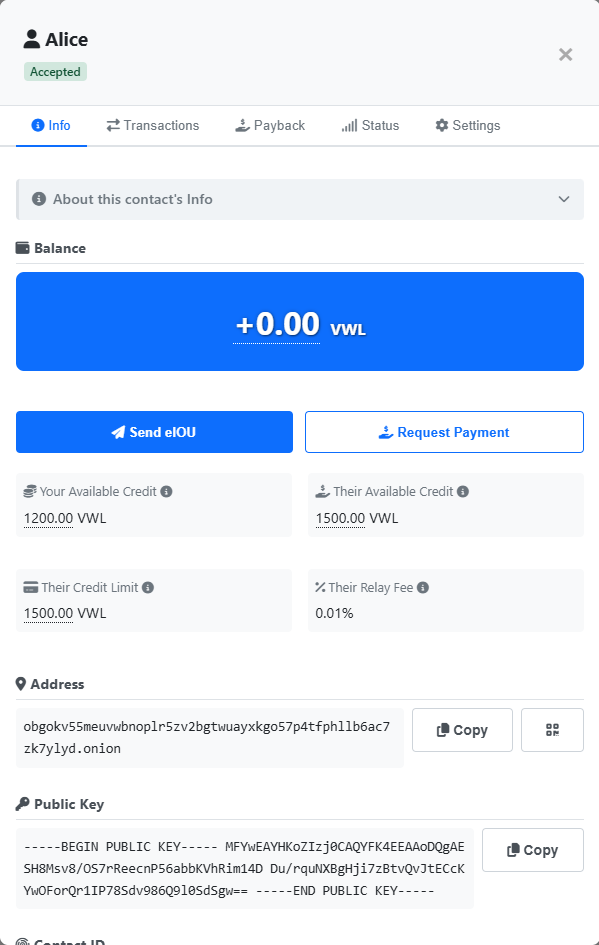
Back on Alice's wallet, click Bob's row in Your Contacts to open the contact detail modal. The modal has tabs for Info, Transactions, Payback, Status, and per-contact Settings. The Info tab shows the agreed terms.
- Status should read accepted (not pending) on both nodes
- Info tab fee + credit-limit reflect the terms set when accepting — Alice's side and Bob's side may differ
The contact detail modal on Alice's wallet
That's the basic add-and-accept flow. Once a contact is in place you can send an eIOU to them — see the next section, Send & receive eIOUs, to continue the walkthrough.